Guides
These are the best ways to back up all your photos and videos
Backing up your photos and videos isn't hard once you know what to do. From hard drives to local backups to the cloud, here's how to protect your work.
Even if you’re not a professional photographer, you should be backing up your photos. And if you are a pro, not only do you need reliable backups, but you need a substantial amount of capacity, especially if you’re doing video. In this guide, we’ll give you all the tips and tricks for backing up for every scenario, including natural disaster and burglary.
Basic backup concepts
When it comes to backing up your precious data — photography or otherwise — the name of the game is redundancy. Why? Because all physical media fails eventually, and not just spinning hard drives, but SSDs and SD cards (micro or full-sized), too. The most reliable storage is actually cloud storage because that data is being maintained by fleets of engineers in data centers. But even then, companies shut down and are acquired all the time.
This is why there are some best practices handed down to us by IT professionals, like the 3-2-1 rule, which goes like this: Create a primary backup as well as two copies of it (so three backups in total), and those should span two different types of media, and at least one should be kept off-site.
This sounds like a lot on paper, but in practice, it’s a little more straightforward. Many photographers have a drive that they work from (active storage), a backup drive located somewhere in their home (inactive storage), and a cloud backup. Of course, this doesn’t quite meet the 3-2-1 ideal outlined above, but it’s so much better than working without a backup at all.
Now that we know what we’re shooting for, what are our options? And how can we achieve maximum protection without spending a truckload of money? Fortunately, the price of storage, backup software, and cloud services has fallen dramatically over the years, and hobbyist photographers may not need to spend anything at all, depending on their needs and expectations.
Input may receive a portion of sales if you purchase a product through a link in this article. We only include products that have been independently selected by Input’s editorial team.
Hard drives
The first thing you’re going to need is at least one hard drive for your backup, preferably two as outlined in the 3-2-1 rule above. Try to get the largest drives you can afford, but be aware that the biggest drives demand a hefty premium. For example, 20TB external drives go for about $25 per TB, 16TB drives go for around $20 per TB, and you can find 8TB drives for $15 per TB.
You’ll also have to decide whether to buy an external drive or a bare drive for use in an enclosure, which we’ll get to in the next section. The critical thing to keep in mind here is that you can buy an external drive, then break it out of its plastic case and use it in an enclosure, but this is risky and it voids the warranty. This is called “shucking” and I’ve done it dozens of times with no issues, but if you have a real photography business with insurance and taxes and all that, just spend the extra money for NAS drives.

The WD 18TB My Book Desktop External Hard Drive has enough capacity to hold decades of photos and even a pretty good chunk of video, as well. These drives are expensive, but keep an eye out for sales.

Both WD and Seagate have drives specifically made for use in NAS and RAID arrays. They’re pricey, but they’ll last a really long time, even under heavy continuous use. The Seagate IronWolf Pro ST16000NE000 16TB is one such drive, and it strikes a good balance between capacity and price.

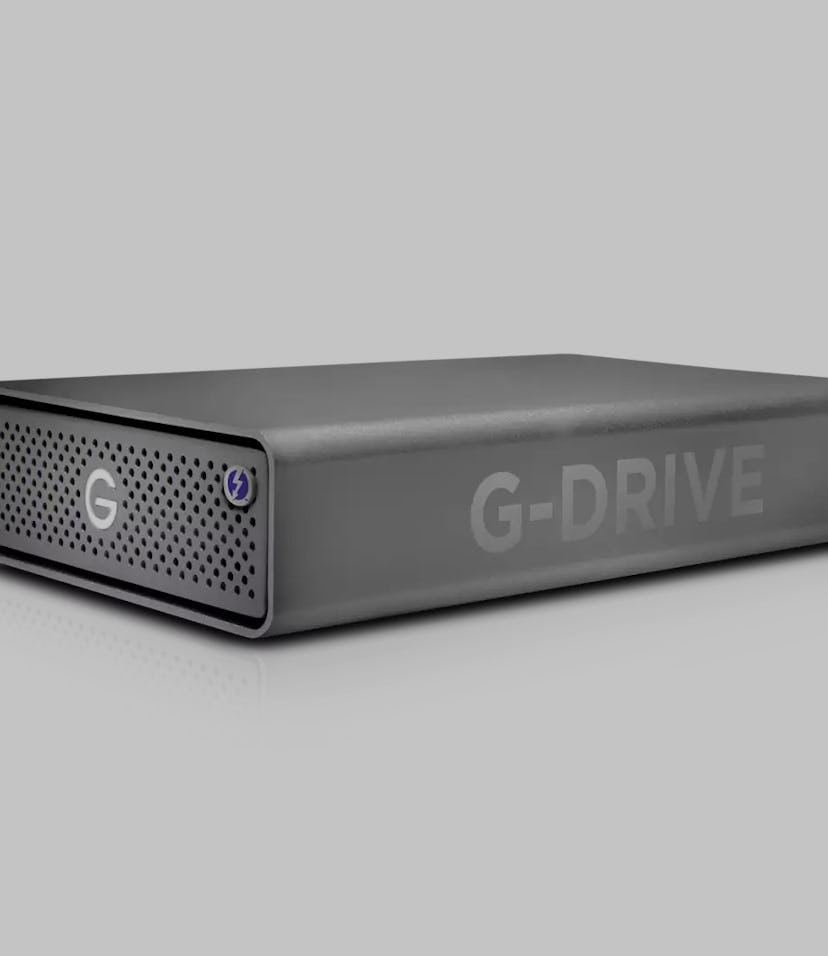
We picked this SanDisk Professional 18TB G-DRIVE Enterprise-Class Desktop Hard Drive for a couple of reasons. First, it looks way better than WD’s black plastic bricks. Second, this hard drive is USB 3.2 and connects via USB-C (a much better plug than the wide “Micro B Super Speed” connector that comes on many drives these days. Third, you know what drives are inside: WD Ultrastars, which are good, pro-grade drives.
Enclosures
External drives are a great way to backup your photos, but once you have more than two, they start to get unwieldy. This is when you should start thinking about using a drive enclosure.
There are many different kinds of drive enclosures. A DAS, or direct-attached storage, is my preferred way to store and backup my photos. These attach to your computer via USB, and they’re basically just external drives with slots for multiple disks.
A NAS (network-attached storage) is similar to a DAS, but instead of connecting via USB, the files are served over a network. Every NAS has a full computer inside, and these computers do things like combine all the disks into RAID arrays, perform automatic offsite backups, and can even be set up as Plex servers. As you’ll see below, all this functionality comes with a hefty price tag.
The DAS vs NAS debate is a huge, multifaceted one, so for the sake of simplicity I’m going to recommend some solid enclosures that will work well for enthusiast photographers and many pros, too.

The Sabrent USB 3.2 4-Bay 3.5" SATA Hard Drive Tray-Less Docking Station is the enclosure that I have, and it’s been running strong for a couple of years now. I bought it because it features USB 3.2, which has 10Gbps of bandwidth. This isn’t an essential spec if you’re just using hard drives, but if you want to use multiple SSDs, it’s good to have.
Even if you only want to use two drives, Sabrent also has a two-bay dock with SD and CFast card readers, but I would avoid the toaster-style docks you’ll see from Sabrent and others. The drives just get too hot without active cooling.

The Syba 8 Bay Tool Less Tray Hot Swappable 2.5" / 3.5" SATA Non Raid External USB 3.0 Enclosure is what I will most likely move to next. Essentially, if you already have several full drives and want to add more storage without replacing your current drives, you need an enclosure with more bays.
The only thing to keep in mind with this enclosure is that it’s only USB 3.0, which has a maximum bandwidth of 5Gbps, or 410MB/s. This may not be fast enough for videographers using the enclosure as active storage, but as a backup or long-term storage solution, it’s great.

As you can see, a 4-bay NAS costs a bit more than twice as much as the 4-bay Sabrent enclosures. This makes sense, as a NAS can do so much more — these things have their own app stores with utilities for hosting FTP servers, email, Plex, and way more. The big advantage a NAS has over a DAS is that it can be accessed by multiple users.
This Synology 4 bay NAS DiskStation DS920+ is a great NAS with high-tech features like dual NVMe slots for content caching and dual 1GbE ethernet ports that can be combined for speed. It’s pricey for a single person, but very affordable if you're serving a small studio.
Local backups
Once you have some storage, your next task is to pick your backup software. Both Macs and PCs have built-in backup functions, and while Time Machine is great for people with Macs and small image libraries, Windows’ backup feature is pretty anemic, buried in the OS, and not exactly intuitive.
When it comes to backup software, there are a few key features to keep in mind. The biggest for photographers is incremental backups, which is where the backup software will only write the data that has changed since the last backup. Every backup software should support this at this point, but I point it out because some software is more oriented toward full-disk imaging, like Macrium Reflect and EaseUS Todo Backup.
Depending on your workflow, you may or may not want file versioning. This is a feature where the backup utility will not just backup a file to another location, but keep track of every version of it as it is changed. Since I work non-destructively in Lightroom most of the time, this isn’t a critical feature for me, but if you do a lot of retouching in Photoshop this is something you might want to set up. Likewise with Premiere Pro project files.

Duplicati is a cross-platform backup utility with all the features you’d expect: incremental backups, file versioning, and support for several cloud storage services. Best of all? It’s totally free.

Despite its questionable website, SyncBack is a solid backup utility for Windows. The free version will get the job done, but you’ll probably want to upgrade to the SE version for $39.95 to get file versioning.

If you’re a Mac user and you don’t need a cross-platform backup software like Duplicati, then there’s always Carbon Copy Cloner. It used to be more of a whole-disk cloner, but recent versions have dramatically expanded the features. It costs $39.99, but at least it’s not a subscription.

Cobian Reflector is a freeware backup utility with a user interface that looks like it's straight out of Windows 2000, but it’s a powerful backup utility that includes everything from scheduling, compression, encryption, and way more.

StabileBit DrivePool isn’t a backup utility, per se, but it makes backups a lot easier by combining multiple drives into one large, single drive. A NAS, for example, combines drives using RAID (usually), and this requires all the drives to be the same size (and ideally the same model). With DrivePool, when your drives are full you can add new drives of any size seamlessly, and they’ll just be added to the pool.
Normally, I wouldn’t be so glowing about any software, but if you handle large amounts of data like photos and video, DrivePool is just hands-down an incredible value for $29.95. It’s such great software that someone asks for a Mac version on r/Datahoarder every month or so. Sadly DrivePool is Windows only.
Cloud software
So you’ve set up your physical backups at this point, now it’s time to set up your cloud backup. Having an off-site backup is critical for when disaster strikes. Local backups are great, but if you’re the victim of a fire, burglary, flood, or other natural disasters, your off-site backup could be the only thing left.
This isn’t to say you need cloud backups — you could store an external drive at a relative’s house. But cloud backups are actually quite affordable, and unlike a physical off-site backup, cloud backups are always up to date and allow you to pluck individual files back if you need them.

Backblaze is now the de facto cloud backup solution for several reasons, but the most important is price. At $7 per month for a personal plan, you can actually back up that 18TB drive you just bought without racking up expensive storage tiers like you would with Google Drive and Dropbox.
The other important thing about Backblaze is that the company will mail you a physical drive of your files if you have a catastrophic data loss. Not everyone will need this, but if you need to restore client work like yesterday, it’s good to have this option.

Crashplan’s Small Business plan is $10 per month and does mostly the same thing as Backblaze. However, Backblaze will do client-side encryption (where only you hold the key) for free, whereas you have to jump up to a full business plan to get that with Crashplan.

I wouldn’t consider Amazon Photos a “backup solution” but if you already have an Amazon Prime account, you might as well take advantage of the company’s unlimited photo storage, which includes RAW images. Sadly unlimited video is not included.
